📸 Lightroom Mobile Photo Editing App Full Tutorial (2025 Guide)
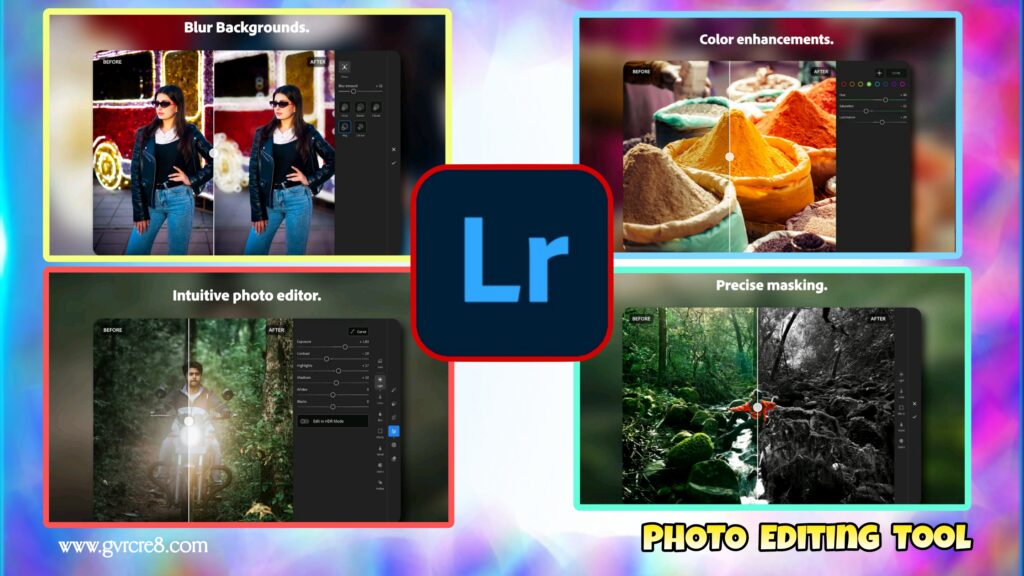
Adobe Lightroom Mobile is a powerful, professional-grade photo editing app that brings desktop-quality editing tools to your smartphone. Whether you’re a photographer, influencer, blogger, or content creator, Lightroom Mobile offers complete control over your images, allowing you to enhance photos with precision and creativity.
In this comprehensive tutorial, you’ll learn everything you need to master Lightroom Mobile in 2025—from importing photos and using presets to fine-tuning lighting, colors, and exporting your final masterpiece.
🌐 What is Adobe Lightroom Mobile?
Lightroom Mobile is the mobile version of Adobe Lightroom, part of the Adobe Creative Cloud. It’s available for iOS and Android, and it syncs with your desktop version (if you’re a Creative Cloud subscriber).
Lightroom Mobile is known for its:
- Non-destructive editing
- RAW photo support
- Advanced sliders and tools
- Presets and profiles
- Cloud syncing
- Pro camera with manual settings
Whether you’re a beginner or a seasoned photographer, Lightroom gives you total control over your photo edits.

🔁 Getting Started with Lightroom Mobile
Step 1: Download and Sign In
- Download Adobe Lightroom Mobile from the App Store or Google Play.
- Sign in with an Adobe account (free or subscription).
Step 2: Import Your Photo
- Tap the “+” icon to add a photo from your camera roll, files, or camera.
- Lightroom supports JPEG, PNG, and RAW (DNG) files.
⚙️ Lightroom Mobile Interface Overview
When you open a photo in Lightroom, you’ll see these main tools at the bottom:
- Light: Exposure, Contrast, Highlights, Shadows
- Color: Temperature, Tint, Vibrance, Saturation
- Effects: Texture, Clarity, Dehaze
- Detail: Sharpening, Noise Reduction
- Optics: Lens correction
- Geometry: Perspective adjustments (Pro only)
- Presets: One-tap styles
- Crop: Resize and straighten
- Selective Editing: Brush, radial, linear masks
- Healing: Spot removal
🌧️ Basic Editing Workflow
Here’s a step-by-step guide to edit a photo from start to finish:
🔦 Step 1: Light Adjustments
Tap the “Light” panel to access:
- Exposure: Brighten or darken the whole image
- Contrast: Deepen shadows and brighten highlights
- Highlights/Shadows: Recover lost detail
- Whites/Blacks: Set the brightest and darkest parts of the photo
Tip: Start with the Auto button to get a smart base edit.
🌈 Step 2: Color Adjustments
Tap “Color” to fine-tune:
- Temp and Tint to fix white balance
- Vibrance: Boost subtle colors
- Saturation: Boost all colors equally
Then, tap “Mix” to access HSL (Hue, Saturation, Luminance) sliders for individual colors. Great for skin tones, skies, and nature scenes.
✨ Step 3: Effects
In the Effects panel:
- Texture: Adds or reduces fine details
- Clarity: Midtone contrast boost
- Dehaze: Removes fog or haze (great for landscapes)
- Vignette: Adds subtle dark corners to focus attention
🔧 Step 4: Detail (Sharpening & Noise Reduction)
- Use Sharpening to enhance crispness
- Noise Reduction helps with grain in low-light photos
- Be careful not to overdo it—it can make photos look unnatural
🔮 Step 5: Optics
- Enable Remove Chromatic Aberration and Lens Correction
- These options fix distortion and color fringing automatically
→Snapseed
🎟️ Using Lightroom Presets
Presets are one-click filters that apply a consistent look to your photo.
How to Use:
- Tap the Presets tab
- Choose from categories: Portraits, Cinematic, Travel, Food, etc.
- Tap a preset to preview it
- Adjust individual sliders afterward to customize
You can also create and save your own presets to use across images and maintain a consistent editing style.
🔍 Advanced Tools in Lightroom Mobile
💼 Selective Editing (Pro Feature)
Allows you to edit specific parts of the photo using:
- Brush Tool: Paint over areas you want to adjust
- Radial Filter: Circular adjustments (great for portraits)
- Linear Gradient: Perfect for landscapes/skies
✖️ Healing Tool
- Tap Healing to remove blemishes or distractions
- Choose Heal or Clone mode
- Adjust size and feather for seamless results
🏋️ Geometry (Pro)
- Adjust perspective and straighten lines (ideal for architecture)
📷 Lightroom Camera (Built-in Pro Camera)
You can shoot directly in Lightroom using its Pro Camera:
- Manual control of ISO, Shutter Speed, White Balance, and Focus
- Shoot in RAW for maximum flexibility
- Grid overlays and level for perfect composition
📱 Exporting and Saving Photos
Once you’re done editing:
- Tap the “Share” icon (top right)
- Choose Export As
- Select format: JPEG, PNG, or Original (RAW)
- Adjust size and quality if needed
- Save to device or share directly to Instagram, Facebook, etc.
Export Tip: Use 2048px or higher resolution for social media to retain quality.
📰 Lightroom for Social Media and Blogging
Here’s how Lightroom helps elevate your content:
- Instagram: Use consistent presets for a cohesive feed
- Pinterest: Brighten and enhance pin graphics
- YouTube Thumbnails: Crop, brighten faces, boost color
- Blog Photography: Edit flat lays, portraits, food shots with color accuracy
Combine Lightroom with Canva for adding text, overlays, and layout design.
✨ Lightroom Free vs. Premium
| Feature | Free | Premium (CC Subscription) |
|---|---|---|
| Basic edits | ✅ | ✅ |
| Presets | ✅ | ✅ + Premium |
| RAW editing | ✅ | ✅ |
| Healing Tool | ❌ | ✅ |
| Selective Edits | ❌ | ✅ |
| Geometry | ❌ | ✅ |
| Sync across devices | ❌ | ✅ |
You can start with the free version, and upgrade for advanced features.
🌟 Tips for Better Lightroom Edits
- Shoot in RAW whenever possible
- Use Auto Tone as a starting point, then fine-tune
- Adjust Color Mix for vibrant but natural colors
- Use Vignette to draw focus to your subject
- Copy/paste settings to apply edits to multiple photos quickly
💪 Final Thoughts
Lightroom Mobile is a professional-grade photo editor that puts powerful tools right in your hand. With its ability to handle RAW files, precise adjustment sliders, and selective editing options, it’s perfect for creating high-quality content for blogs, social media, or even commercial use.
Whether you’re just starting or want to take your photo editing to the next level, mastering Lightroom Mobile will make a noticeable difference in the quality and style of your work.
Start editing smarter today with Lightroom Mobile – your pocket-sized photo studio!